Showing posts with label delicious. Show all posts

Monday, October 22, 2012

Pumpkin!

I love pumpkin. Pumpkin anything. Pie. Muffins. Coffee. Doughnuts. Ale. Ice Cream. Bread. Cake. So I got a couple of cans of pumpkin last week and went to town. I made the Pumpkin Bread from my fall baking list and I tried a homemade Pumpkin Spice Latte.

Now there's a story behind the latte. The day I made it, I had been out and about all day, shopping and running errands and such. Well I decided I had a wicked craving for a pumpkin coffee. So I pull up to the Starbuck's drive-thru and order a Pumpkin Spice latte. The man on the other end of the speaker replies that they are out of Pumpkin Spice for the day. Worst Starbuck's ever. So I drove away. I figured I could still hit up Dunkin' for a pumpkin coffee. Wrong, apparently. I came to find out that my Dunkin' had closed and been all but torn down. At that point, I gave up.

So that's my story. I was forced to make my own pumpkin coffee from scratch. It turned out to be a good thing, since both the bread and the latte came out fantastically, if I may say so!

Pumpkin Bread
Ingredients
- 5 eggs
- 1 1/4 C. vegetable oil
- 1 (15oz) can pumpkin
- 2 C. flour
- 2 C. sugar
- 2 (3oz.) pkgs. cook-and-serve vanilla pudding mix (not instant)
- 1 tsp. baking soda
- 1 tsp. cinnamon
- 1/2 tsp. nutmeg
- 1/2 tsp. salt

Method
- In a large mixing bowl, beat the eggs for about a minute. Add the oil and pumpkin, and beat until smooth.

- Combine the flour, sugar, pudding mix, baking soda, cinnamon, nutmeg, and salt with a whisk.
 

- Gradually beat the dry ingredients into the pumpkin mixture. Mix until just combined.


- Pour the mixture into 2 greased loaf pans. (I cut the recipe in half, so I only used one.)


- Bake at 325 degrees F for 50-55 minutes, or until a toothpick inserted comes out clean.


- Cool for 10 minutes in the pan before removing to a wire rack to cool completely.


Pretty simple recipe, but super delicious. It doesn't have great measurements to conveniently cut in half, but it's do-able. The eggs were the hardest, since it's weird to try for 2 1/2 eggs, but I pretty much just used 2 eggs plus one yolk. Maybe it's easier to just make the full recipe and freeze one, or give one away!


Pumpkin Spice Latte
Ingredients (Single Serving)
- 1 C. milk
- 1/2 tsp. cinnamon
- 1/8 tsp. nutmeg
- 1/8 tsp. allspice
- 1/8 tsp. ground cloves
- 1 1/2 Tbsp. canned pumpkin
- 1 Tbsp. brown sugar
- 1/2 Tbsp. vanilla extract
- 1 C. very strongly brewed hot coffee

Method
- In a small saucepan over med-high heat, warm the milk, cinnamon, nutmeg, allspice, cloves, pumpkin, and brown sugar until steaming (but not boiling!).


- Remove from heat and stir in the vanilla.

- Pour the milk mixture into a large blender and blend until frothy. (Be very careful when blending the hot liquid. It will expand rapidly. As a precaution, take the insert out of the top and just cover the hole with a kitchen towel while blending, so the lid doesn't blow off!)


- Add the milk mixture to the strong hot coffee, in a large mug. Sprinkle with cinnamon and serve!


It was the perfect fall day treat! I actually made a pumpkin pie last weekend, too, but I was in a hurry and didn't take any pictures. Oh, well... I'm sure I'll make it again soon! 'Tis the season - go forth and make something pumpkin-y!


Enjoy!

Saturday, October 6, 2012

Whole Wheat Banana-Nut Muffins


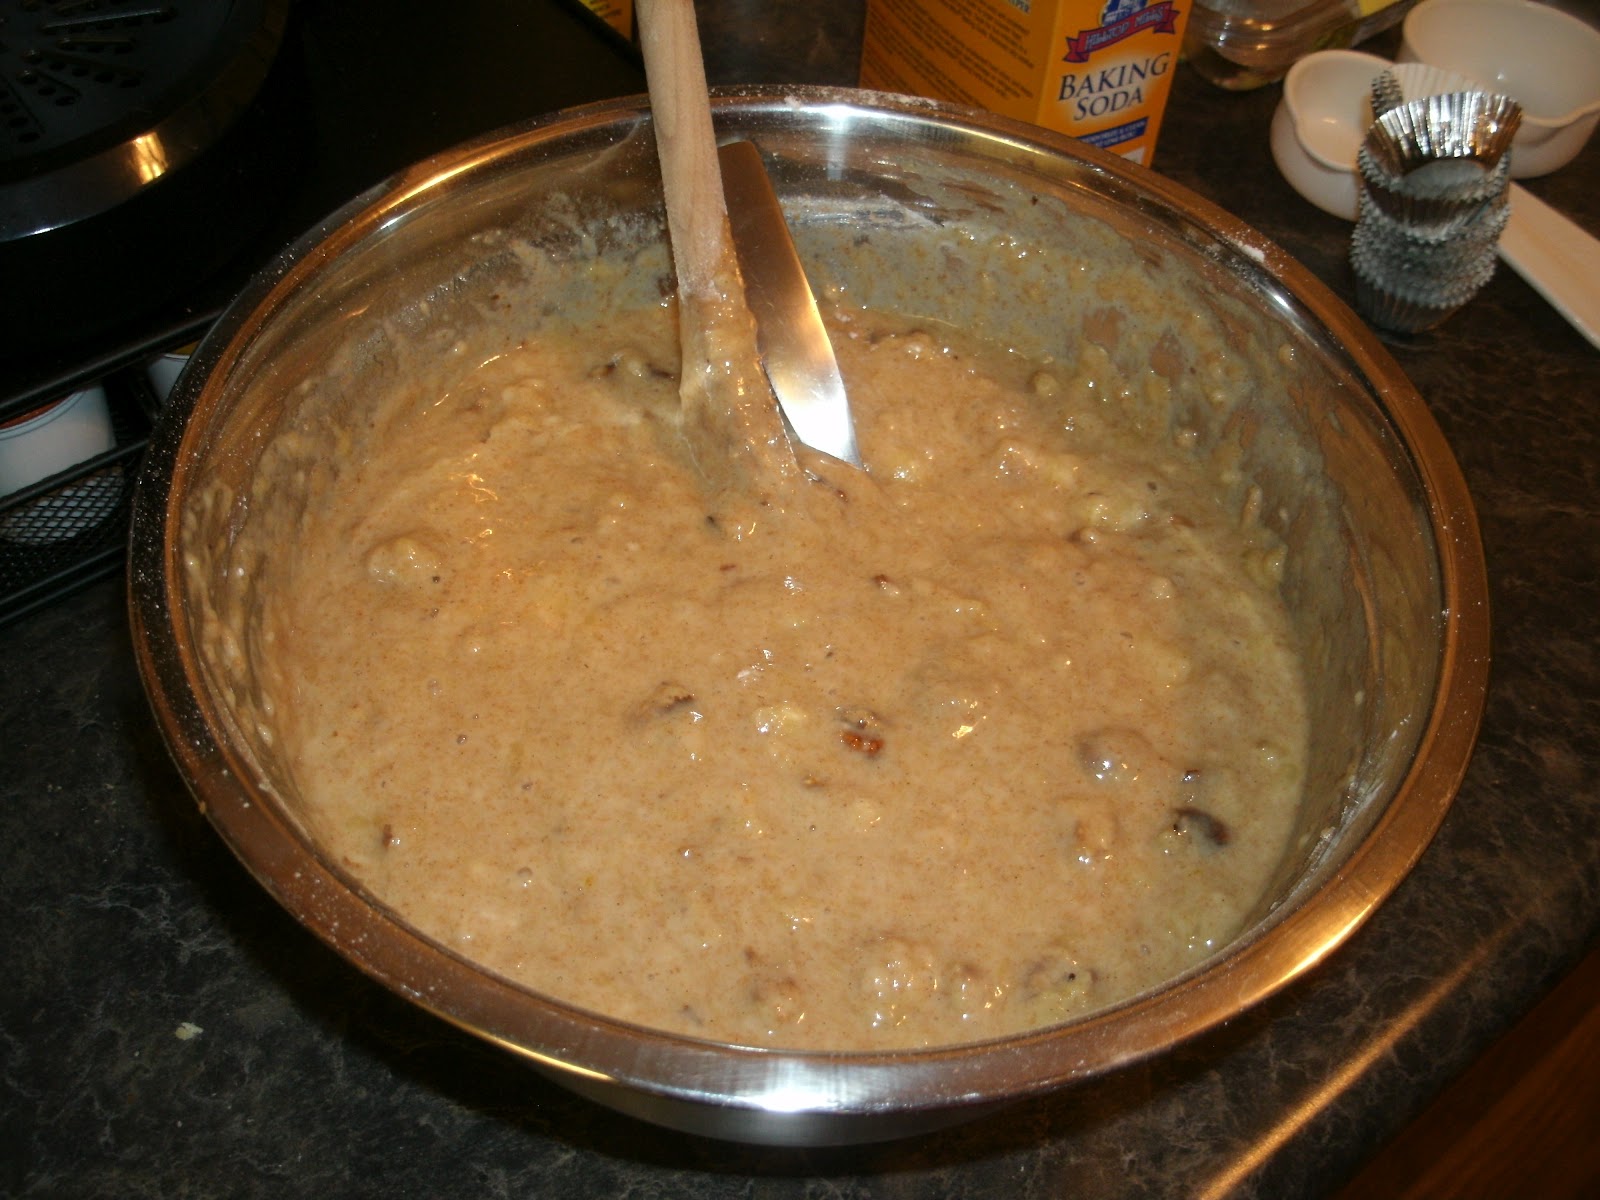
I've been in the kitchen! A lot lately, actually. I have a few recipes to blog about, I just haven't had the ambition to sit down and write. I made these muffins a couple of weeks ago to share with my coworkers. I was going to make mini-muffins out of them, but it would have taken forever, so I went with normal-sized. Now, I know that these weren't on my fall baking agenda, but I had ripe bananas to use up. They turned out to be pretty perfect, and the recipe is really simple!

In other news, I visited Howl-o-Scream last weekend. I went with a couple of friends from work and we made a day of it. During the daytime, we rode all of the roller coasters and caught a couple of shows. We even stayed after dark, when the scare-actors come out and the haunted houses open. I went through all 6 haunted houses. And survived. I know, I even shocked myself! It was incredibly fun, and everyone in the greater Virginia area should check it out!

 Anyway, with no further ado...


Whole Wheat Banana-Nut Muffins
(Adapted from the Banana Nut Muffins recipe on www.simplyrecipes.com.)

Ingredients
6 overripe bananas, mashed
2/3 C. melted butter
1 1/2 C. sugar
2 eggs, beaten
2 tsp. vanilla
2 Tbsp. espresso or strong coffee
2 tsp. baking soda
1/4 tsp. salt
1/2 tsp. cinnamon
2 C. all-purpose flour
1 C. whole wheat flour
2 C. chopped walnuts

Method
- Preheat the oven to 350 degrees F. Mix the melted butter into the mashed bananas with a wooden spoon, in a large mixing bowl.

- Mix in the sugar, eggs, espresso, and vanilla until well incorporated.

- Sprinkle the baking soda and salt over the mixture, then stir in. Add the cinnamon and stir until blended.

- Add all of the flour at once (all-purpose and whole wheat), then stir until it is just incorporated. (Make sure there are no pockets of flour left, but don't over-mix it!) Fold in the chopped walnuts.


- Line a couple of muffin tins with cupcake wrappers. Fill them about 3/4 of the way full with the batter. Bake for 25-30 minutes, or until an inserted toothpick comes out clean. Cool completely on a wire rack, then store in an airtight container.


Makes about 2 dozen muffins. You could sprinkle sugar or cinnamon-sugar on top. You could also probably substitute a can of pumpkin for the bananas and have a much more fall-y pumpkin-nut muffin. Get creative!

Enjoy!

Saturday, July 28, 2012

Chicken Enchilada Casserole


I cooked again! This time, I even have a recipe to share. But first let's talk about my day off. I usually have Saturdays off, but I had Friday this week. So today, I had planned on getting up early, going to the New Kent Winery, then driving back down Rt. 60 and hitting every thrift store/antique store/second-hand shop along the way. Wellll, I slept a lot later than I intended to, and then this huge storm hit and everything got a little screwed up. But. I did make it to New Kent Winery in New Kent, VA.


It's a gorgeous building, and there are pretty extensive vineyards all around it. I got there right after a tour had ended, and the next one wasn't for 45 minutes, so I just did a tasting. For $6, I got to try 10 wines and keep the wine glass. Not too shabby. I ended up buying a Vidal Blanc and a White Merlot. I fell in love with the White Merlot at Victoria Valley Vineyards when I was in South Carolina, and this one is almost identical. I'll definitely be stocking up on it!

After the winery, I headed back down 60, and that's when the storms hit, so I didn't stop at every antique store that I saw, or any for that matter. I did stop at the Williamsburg Pottery Factory, though, as well as the Yankee Candle Village. I wrapped up the day with some Carside-to-Go from Applebee's, coming home to eat, and watching the movie Waitress, which turned out to be pretty good. It turned out to be a decent day off, and I found a fantastic winery that isn't too far away!

Now on to my new recipe. It's adapted from the Chicken Enchilada Pasta recipe from Taste of Home. There was a lot that I didn't like about their version, though, so here's my own Chicken Enchilada Casserole:


Chicken Enchilada Casserole

Ingredients:
12 oz. pkg. of pasta (I used mini shell macaroni)
1 lg. sweet red bell pepper - seeded and finely chopped
1 lg. green bell pepper - seeded and finely chopped
1 C. finely chopped red onion
1 Tbsp. hot sauce
3 Tbsp. vegetable oil
3 - 5 oz. cans chunk white chicken, drained
15 oz. can refried beans
1/2 of a packet of taco seasoning mix
16 oz. jar of enchilada sauce, divided
8 oz. package of Mexican or taco-blend shredded cheese
tortilla chips
sour cream

Method:
- Cook pasta according to package directions. Drain. Rinse, and drain again. Set aside. You'll want to stir it every 5-10 minutes while it sits, so it doesn't congeal into a big pasta blob. Trust me. It happens.

- Preheat oven to 350 degrees F. In a large skillet, heat the vegetable oil. Add the chopped peppers and onion, as well as about a 1/4 tsp. salt. Cook until vegetables are tender, 5-8 minutes.


- To the vegetable mixture, stir in the chicken, refried beans, hot sauce, taco seasoning mix, and 1/2 C. of the enchilada sauce. Cook and stir for about 5 minutes. In a large bowl or pot, fold together the chicken mixture and the pasta. Fold in half of the shredded cheese, until melted and well incorporated.


- Take a 3-qt. casserole dish. Spray it with nonstick cooking spray, then spread half of the remaining enchilada sauce on the bottom. Spoon in the pasta mixture evenly on top of the sauce. Drizzle the remaining enchilada sauce on top.


- Cover the whole thing with foil and bake, covered, for 30 minutes. After the half hour, uncover it and sprinkle the remaining shredded cheese on top. Bake, uncovered, for 5 minutes more, or until the cheese is melted and bubbly.


- Spoon out onto plates and serve with crumbled tortilla chips sprinkled on top, and a dollop of sour cream!


It's delicious. You can use more or less hot sauce, depending on your taste. If you don't have the time or patience to let it bake for 35 minutes, you could always skip the pasta, just make the chicken mixture and eat it in flour tortillas. Then you're just cutting out the casserole part and having chicken enchilada wraps.... You could also use boneless, skinless chicken breasts instead of canned chicken. Just cook it up and shred it. Canned chicken is just cheaper, faster, and easier. (Read: I'm lazy.)

It's such a great recipe to play around with. You can make it as complicated or simple as you like and substitute/add/subtract ingredients. It's super versatile, and can be made to fit anyone's tastes. So have at it!

Enjoy!

Tuesday, May 1, 2012

Birds' Nests

I haven't really been baking much lately. Nor have I been hiking. There's not much to talk about with the move yet. Hence the lack of blogging this past week or so. But. I'm itching to write a post, so I'm pulling out this recipe. I made "Birds' Nests" for Easter, and took pictures and everything, but never actually wrote the post. So here's a bit of a delayed Easter post. Happy belated Easter?

(There were Rice Krispie Treats, too, but just plain old run-of-the-mill Rice Krispie Treats... with M&Ms on top. Nothing to blog home about.) 

They're called "Birds' Nests" because of the "eggs" (jelly beans) on top. If you leave the jelly beans off, then they're "Haystacks". They're usually only Birds' Nests at Easter/springtime; the rest of the year they're Haystacks, in my kitchen anyway.

I don't think I'm going to post this in regular recipe format. Mostly because there is no set ingredient list, and they're super-mega-easy to make. In their most basic form, all you need is a bag of baking chips (chocolate, butterscotch, peanut butter, whatever) and a bag of Chow Mein noodles. My favorite is butterscotch. You melt the chips over low heat (or in a double boiler to make sure they don't burn), and very carefully stir in the Chow Mein noodles, breaking as few as possible. I also usually stir some peanuts in. (I didn't at Easter because my youngest nephew is allergic.)


So to recap... melt chips, stir in noodles (and nuts, if so desired). Then you drop spoonfuls on to baking sheets covered with wax paper or foil. Shape them into nests/stacks, and place some jelly beans on top if you're going for the nest theme.


At Easter, I did half butterscotch and half chocolate. So I split a whole bag of Chow Mein noodles into two, and used half a bag each of butterscotch chips and chocolate chips. 


After you have them all spooned out and shaped, either set them in a cool place for a couple of hours until they harden, or put them in the fridge for half an hour to an hour until they're set. 


I made a little dessert tray with my Nests and Treats. Of course, I also had pies and a cake. This was just a little... appetizer... dessert... tray...? They were pre-dessert desserts. Appesserts. That's totally a thing. Go with it. When I write my cookbook, maybe I'll have an Appesserts section. These will probably be in it.

These are a great little treat because it's impossible not to like them, they're totally versatile, and they're sooo simple. You can make them into whatever flavor floats your boat. You can add in anything you want, or just leave them at two ingredients. How could you not love this recipe? Go forth and make some Birds' Nests/Haystacks to share. Also, spread the word Appesserts. It really needs to catch on.

Enjoy!

Monday, April 23, 2012

Chocolate-PB-Banana Smoothie


Ok, so this wasn't exactly a difficult recipe to come up with, but it's so freaking delicious that I had to share. I've been super into fruit smoothies, sometimes with kale and/or spinach in them. This is a bit more of an indulgent smoothie.


Now don't let the word indulgent throw you off. While this does taste very dessert-y and it may not have as many fruits and veggies as a health-nut smoothie, it's far from bad for you. In fact, this smoothie is probably the perfect post-workout drink. Not to mention, even with all the delicious in it, it's still only about 250 calories!

As you may have heard recently, chocolate milk is the new "it" post-workout drink. Instead of just water or a sports drink, chocolate milk has protein, carbs, and sugar, so you get a little energy boost and you give your body something to metabolize. Well, this smoothie has chocolate and milk in it. It also has yogurt (even more protein), peanut butter (yet more protein), a banana (vitamins, minerals, carbs, natural sugars), and ice (for hydration). I've gotten back into a workout routine lately and I feel like I'm going to be having this smoothie quite a bit!


 Ingredients
1/4 C. skim milk
1/4 C. plain or vanilla yogurt
1 Tbsp. smooth peanut butter
2 tsp. chocolate syrup
1 medium banana, cut into pieces
5 or 6 ice cubes

Method
- Add milk, yogurt, peanut butter, chocolate, and  cut-up banana to a blender. Cover and blend for about 30 seconds.
- Add the ice cubes, and blend for 30-45 seconds, or until no chunks of ice remain.
- Drink!


Now I have to admit that I didn't actually measure anything when I made this, so I'm guessing on the amounts I used. It would be really difficult to mess this up, though, and depending on your tastes, you may want more or less of something anyway. Love chocolate? Add another tsp. or two. Hate peanut butter? We're not friends. Like a thicker, more frappuccino-like smoothie? Add more ice and blend it a little longer. Want a sweeter/more tropical taste? Use almond or coconut milk instead of skim. Play around with it!

Enjoy!


Thursday, April 19, 2012

Banana-Rum Birthday Cake


This is my 100th post on this blog! I was torn between writing about my weekend in Williamsburg, and this post. This won, though. I decided I had to do a recipe for my 100th post!

For my mom's birthday, I made her a Banana-Rum Cake with Browned Butter Frosting. It was amazing, if I do say so myself. Once again, the recipe is from the Joy the Baker Cookbook. This will probably be my last Joy the Baker recipe post for awhile, since she'll probably sue the pants off me if I post every recipe in her cookbook! Maybe she'll forgive me if everyone goes and buys her book.


Some of my cakes have been coming out really dense lately. I'm not sure why.... This one came out perfectly, though. There was some... confusion... about the cake situation, and I didn't know if I'd be making one till late, so I didn't have time to decorate it. Mom had some candles to blow out, though, and my cake decorating skills aren't very impressive, so it was probably better this way!


Banana-Rum Cake with Browned Butter Frosting

Ingredients
For the cake:
3 C. flour
2 1/4 tsp. baking powder
3/4 tsp. baking soda
1 tsp. salt
1 1/2 tsp. ground cinnamon
1/2 tsp. ground nutmeg
3/4 C. unsalted butter - softened
1 3/4 C. packed brown sugar
2 1/4 C. (about 4) mashed bananas
3 Tbsp. rum
3 eggs
1/2 C. plus 2 Tbsp. buttermilk
1/2 C. chopped pecans

For the frosting:
3/4 C. salted butter
3 C. powdered sugar - sifted
1 Tbsp. vanilla extract
1 Tbsp. rum
1/2 C. heavy cream

Method
- Place a rack in the center of the oven, and preheat to 350 degrees F. Grease and flour two 8-inch round cake pans. Set aside.

- To make the cake: In a medium bowl, whisk together the flour, baking powder, baking soda, salt, cinnamon, and nutmeg. Set aside.

- In the bowl of an electric stand mixer, cream together the butter and brown sugar for about 3 minutes, until light and fluffy. Add mashed bananas and rum and mix well. Add the eggs, one at a time, beating well after each addition.

- With the mixer on low speed, add half of the flour mixture. Add the buttermilk and mix until just combined. Add the remaining flour mixture and mix until almost completely incorporated. Remove the bowl from the mixer and finish mixing by hand, to avoid over-mixing. Fold in the pecans.

- Divide the batter between the cake pans and bake for about 30 minutes, or until a toothpick inserted comes out clean. Remove from the oven and let the cakes rest in the pans for about 20 minutes before removing them to wire racks to cool completely before frosting.


- For the frosting: In a medium saucepan over medium heat, melt the butter until browned in color and nutty in fragrance. (As the butter heats, foam will form on top, and brown bits will settle on the bottom. This is normal, and the bits are where all the flavor is!) Pour the browned butter into a small bowl to cool.

- In the bowl of an electric stand mixer, add the powdered sugar. Turn the mixer on low, and pour in the cooled browned butter in a stream. Increase the speed to medium and add the vanilla and rum. Beat until mixed well - a couple of minutes. Reduce the speed to low and slowly add the cream. Increase the speed back to medium and beat until smooth and creamy. If it's too thick, add some more cream; if it's too thin, add some more powdered sugar. Spread between the layers and on the top and sides of the (completely cooled) cake.


It's a bit of an intimidating recipe, but it's worth it! It's sweet and banana-y and browned butter-y. It's a great combination of flavors. Definitely one of my favorite cakes, and browned butter is my new favorite thing!

In other news, there will be a post coming up about my apartment hunting weekend and my new apartment in VA! For now, go and make this cake. You can share it if you want. There would be no shame in eating the whole thing yourself. You may just want to find a treadmill afterwards.


Enjoy!

Saturday, April 7, 2012

Happy Easter!


Happy Easter! I made cupcakes! They were for my mom's 3rd graders. I used Joy the Baker's Simple Vanilla Cupcakes recipe, with a couple of changes. For the icing, I used some horrible icing recipe that I found online. It really was pretty gross, but I kept adding things until it tasted good. I won't share the icing recipe, because I really don't know what or how much of anything that I added to make it decent.


These cupcakes are surprisingly dense and moist, and totally delicious. I made a triple batch, since a single batch only makes a dozen.

Vanilla Cupcakes
(adapted from Joy the Baker's Simple Vanilla Cupcakes)

Ingredients
1 1/3 C. all-purpose flour
3/4 tsp. baking powder
1 stick margarine
1 C. sugar
2 eggs
2 1/4 tsp. vanilla extract
1/2 C. whole milk

Method
- Place a rack in the middle of the oven. Preheat to 350 degrees F. Line a 12-cupcake pan with cupcake liners and set aside.

- In a medium bowl, whisk together the flour and baking powder. Set aside.

- With an electric stand mixer, cream butter and sugar together for about 4 minutes, until light and fluffy. Add the eggs, one at a time, beating for 1 minute after each addition. Beat in the vanilla extract until well incorporated.

- Add half of the flour mixture and beat on low until just incorporated. Add the milk and beat until blended. Add the rest of the flour mixture and beat until almost incorporated. Remove the bowl from the mixer and finish stirring by hand, to avoid over-mixing. Divide the batter between the 12 cupcake liners.


- Bake for about 25 minutes, until golden brown and a toothpick inserted comes out clean.

- Remove from the oven and let rest in the pan for a few minutes before removing to wire racks to cool completely.


- Once completely cool, frost and decorate!


They're sweet and vanilla-y and delicious. Kids and adults alike will love them. You can use any icing you want, and decorate them for any holiday or occasion. Totally a versatile recipe.

I had some extra cupcakes, so I played around with decoration. I had these adorable Easter sprinkles in my collection, and Mom got the bunny and egg toppers. Then I played around with decorating tips and techniques. One day, I WILL take a cake decorating class. Until then, I will keep trying to teach myself!


Enjoy!

Tuesday, April 3, 2012

Mini Chocolate Lava Cake

Guys. You guys. This recipe, you guys. Wow. It is, of course, from the Joy the Baker Cookbook. She calls it Single Girl Melty Chocolate Cake. I needed a slightly more masculine name, so I went with Mini Chocolate Lava Cake. It's gooey and chocolatey and super simple. Also, dangerous. I'm going to make this all the time. Just for me. Maybe several times a day.


Mini Chocolate Lava Cake

 Ingredients
1 Tbsp unsalted butter
1/4 C. semisweet chocolate chips
1 large egg
4 tsp. white sugar
pinch of salt
1 tsp. all-purpose flour

Method
- Place a rack in the center of the oven, with a cookie sheet on it. Preheat to 375 degrees F.

- Generously butter and flour a 1-cup ramekin and set aside.

- In a small pot, bring 2 inches of water to a simmer. Place the butter and chocolate chips in a small heatproof bowl and place over the simmering water. Stir until the chocolate is melted. Remove from heat and cool slightly.


 - In a small bowl, whisk together the egg and sugar.  Pour in the slightly cooled melted chocolate mixture, and whisk until well incorporated. Add the salt and flour, and stir until just combined. Pour batter into the prepared ramekin.


 - Place the ramekin on the cookie sheet in the preheated oven. Bake for 7-10 minutes*. The less time in the oven, the gooier the cake will be. Remove from the oven and allow to cool for 2 minutes.


- Using pot holders, carefully invert the cake onto a plate.


 - Enjoy immediately!

The * after "7-10 minutes" is because I actually had to bake mine for about 15 minutes. I took it out after 10, and it was still pretty much liquid. After awhile, I just stopped using the timer, and waited until it was puffed up and a little more solid.

Also, make sure you butter and flour the ramekin very well. A piece of mine stuck when I inverted it, as you can see in that last picture.

It was delicious, and quick, and totally worth it. Have it with a scoop of vanilla bean ice cream, and you've just found Heaven. Double the recipe and use two ramekins for a quick, easy, delicious, impressive date night dessert.

I totally plan on experimenting with this recipe. Adding a little vanilla or mint extract, maybe? Some peanut butter chips? Some rum? Coffee? Top it with some raspberry jam? Sliced strawberries? Banana? The possibilities are endless. Maybe I'll open up a cafe and only serve variations on this recipe! Lava Cake Cafe? Any backers out there interested in investing?!

Enjoy!

Thursday, January 5, 2012

White Chocolate-Cherry Shortbread Cookies

Before I get to this amazing recipe, I just wanted to update everyone on happenings in my life. My dad had his surgery two days ago. He had most of his esophagus removed and his stomach is now attached to his throat. They said everything looks good and they got all the cancer. We'll know for sure if it's all gone when we get the pathology report back. He's doing very well and recovering nicely. There might be a problem with his heart rate since his stomach is now behind his heart, but the surgeon didn't seem worried, and he said if it continues, they'll fix it with medication. So he has a minimum of 13 days left in the hospital, but he's doing well!

In other news, I got a call from the theatre in Wisconsin. I have to call them back today, but I think they're going to offer me the job! I hate to move so far away, but it's not for over 4 months yet, and I would only be there for 5 months. I also got an e-mail from a theatre near Philly. They're remodeling the theatre and hope to open this summer, so they'll start hiring staff soon. I'm keeping all of my fingers crossed that they give me an interview! I'd much rather move to Philadelphia than Wisconsin!

So those are the major events going on in my life. It's all very exciting! Now on to this great recipe. I wasn't going to post any Christmas cookie recipes since it's well past Christmas, but I love these! They can be made any time of the year, they're not just for Christmastime, so I thought it would be ok to share.


White Chocolate-Cherry Shortbread Cookies

Ingredients
1/2 C. maraschino cherries - drained and finely chopped
2 1/2 C. flour
1/2 C. sugar
1 C. cold butter
12 oz. white chocolate - finely chopped
1/2 tsp. almond extract
4 drops red food coloring
2 tsp. shortening
sprinkles, edible glitter, colored sugar, etc.

Method
- Preheat oven to 325 degrees F. Spread chopped cherries on a paper towel to drain well.
- In a large bowl, combine flour and sugar. Using a pastry blender, cut in the butter until crumbly. Stir in drained cherries and 4 oz. of the chopped white chocolate. Stir in almond extract and food coloring. Knead the mixture until it forms a smooth ball, and the coloring is evenly distributed throughout the dough.
- Shape dough into 3/4-inch balls and place 2" apart on a greased cookie sheet. Using the bottom of a glass dipped in sugar, or your hands, flatten the balls.
- Bake for 10-12 minutes, until centers are set. Cool for a minute on the cookie sheets, then transfer to a wire rack to cool completely.
-In a small saucepan, combine the remaining chocolate and shortening. Stir over low heat until melted and smooth. Dip half of each cookie in the melted chocolate and allow excess to drip off. Roll the dipped edge in sprinkles, edible glitter, sugar, etc., if desired. Place on wax paper to dry. Once dry, store in a cool place in an airtight container.


A few notes from my kitchen:
-To chop the cherries finely, I just ran them through a mini-chopper for a few seconds, then spread them out on the paper towels.
-I also chopped the chocolate in a chopper. I just used white chocolate chips, so there were some bigger chunks. For smaller bits, use bars of chocolate. (Chocolate chips don't chop well in an electric chopper, but I like the bigger bits.)

Enjoy!


*Update*

I just got off the phone with the American Players Theatre in Wisconsin. I got the job! So basically, I'll be living and working in Spring Green, Wisconsin from May 14th-October 11th.

Thursday, November 17, 2011

"Coconut Bar Pie"

Sorry my posting has been pretty erratic lately. I'm busy living my life of leisure. I'm working a few hours a week at the Campus, but mostly I watch Netflix and eat.

So how many of you tried the Coconut Bar Pie when Perkins still had it? It was probably the best pie I've ever had. Ever. Well, it was a limited time thing, so I decided to try to make my own version so I can have it whenever I want. I took bits and pieces from several other recipes, and combined them to make my own Coconut Bar Pie recipe.

I'm pretty stoked because this is really the first recipe I've come up with on my own. I'm great at following recipes, but not at making them up. It turned out pretty great, so I'm totally impressed with myself. Now... I'm not sure if "Coconut Bar Pie" is copyrighted or anything by Perkins, so if it is, I'll probably change the name to Coconut Creme-Truffle Pie, since the chocolate layer is actually just a recipe for truffle filling. It's pretty amazing, not gonna lie.


Coconut Bar Pie

Ingredients:

Crust:
1 C. chocolate graham cracker crumbs
1/4 C. sugar
3 Tbsp. melted butter

Chocolate Layer:
1/4 + 1/8 C. whipping cream (3/8 C. total)
1 Tbsp. butter
7 oz. chocolate chips, or chopped semi-sweet chocolate
1/4 C. flaked coconut

Coconut Creme Layer:
Lg. package (5oz.) instant vanilla pudding
1 3/4 C. cold milk
1 1/2 tsp. coconut extract
1/2 C. flaked coconut
1 container lite Cool Whip - thawed

Garnish:
Toasted Coconut


Method:

1. For the crust, preheat oven to 375 degrees F. Spray a 9" deep dish pie plate with cooking spray. Combine crumbs, sugar, and butter in a mixing bowl. Mix until the mixture is an even consistency (no lumps). Press crumb mixture into pie plate to form a crust. Bake at 375 for 10 minutes. Do not overbake - it will be too hard! Cool completely.

2. In a saucepan, heat whipping cream and butter over medium heat until just boiling. Remove pan from heat and add chocolate. Do not stir right away - just cover the pan and let sit for 5 minutes. Uncover and stir until chocolate is completely melted. Spread chocolate mixture into the bottom of the crust. Sprinkle with 1/4 C. flaked coconut. Put in the fridge to let the chocolate set.

3. Whisk together the instant pudding, milk, and coconut extract until combined and thick. Stir in the 1/2 C. flaked coconut. Fold in half of the container of Cool Whip. Spread pudding mixture on top of the chocolate layer in the crust.

4. Top with the other half of the Cool Whip. To toast the coconut, spread a handful on a cookie sheet and put under the broiler in the oven until lightly browned. Keep an eye on it, it can burn quickly! Sprinkle toasted coconut on top, and refrigerate the pie until it's set.


Enjoy! It's delicious!


Hint: Take the pie out of the fridge half an hour or so before you plan to serve it. I learned the hard way that it's difficult to cut through the chocolate layer when it's still fridge-cold and solid!

Tuesday, September 27, 2011

Fall Recipes

So I've actually had the opportunity to make quite a bit of food recently. It's very exciting! Now I'm thinking about having a stand at the New Columbia Apple Butter Festival. I would have some crocheted stuff, as well as baked goods. We'll see how much crocheting I get done in the next couple of weeks.

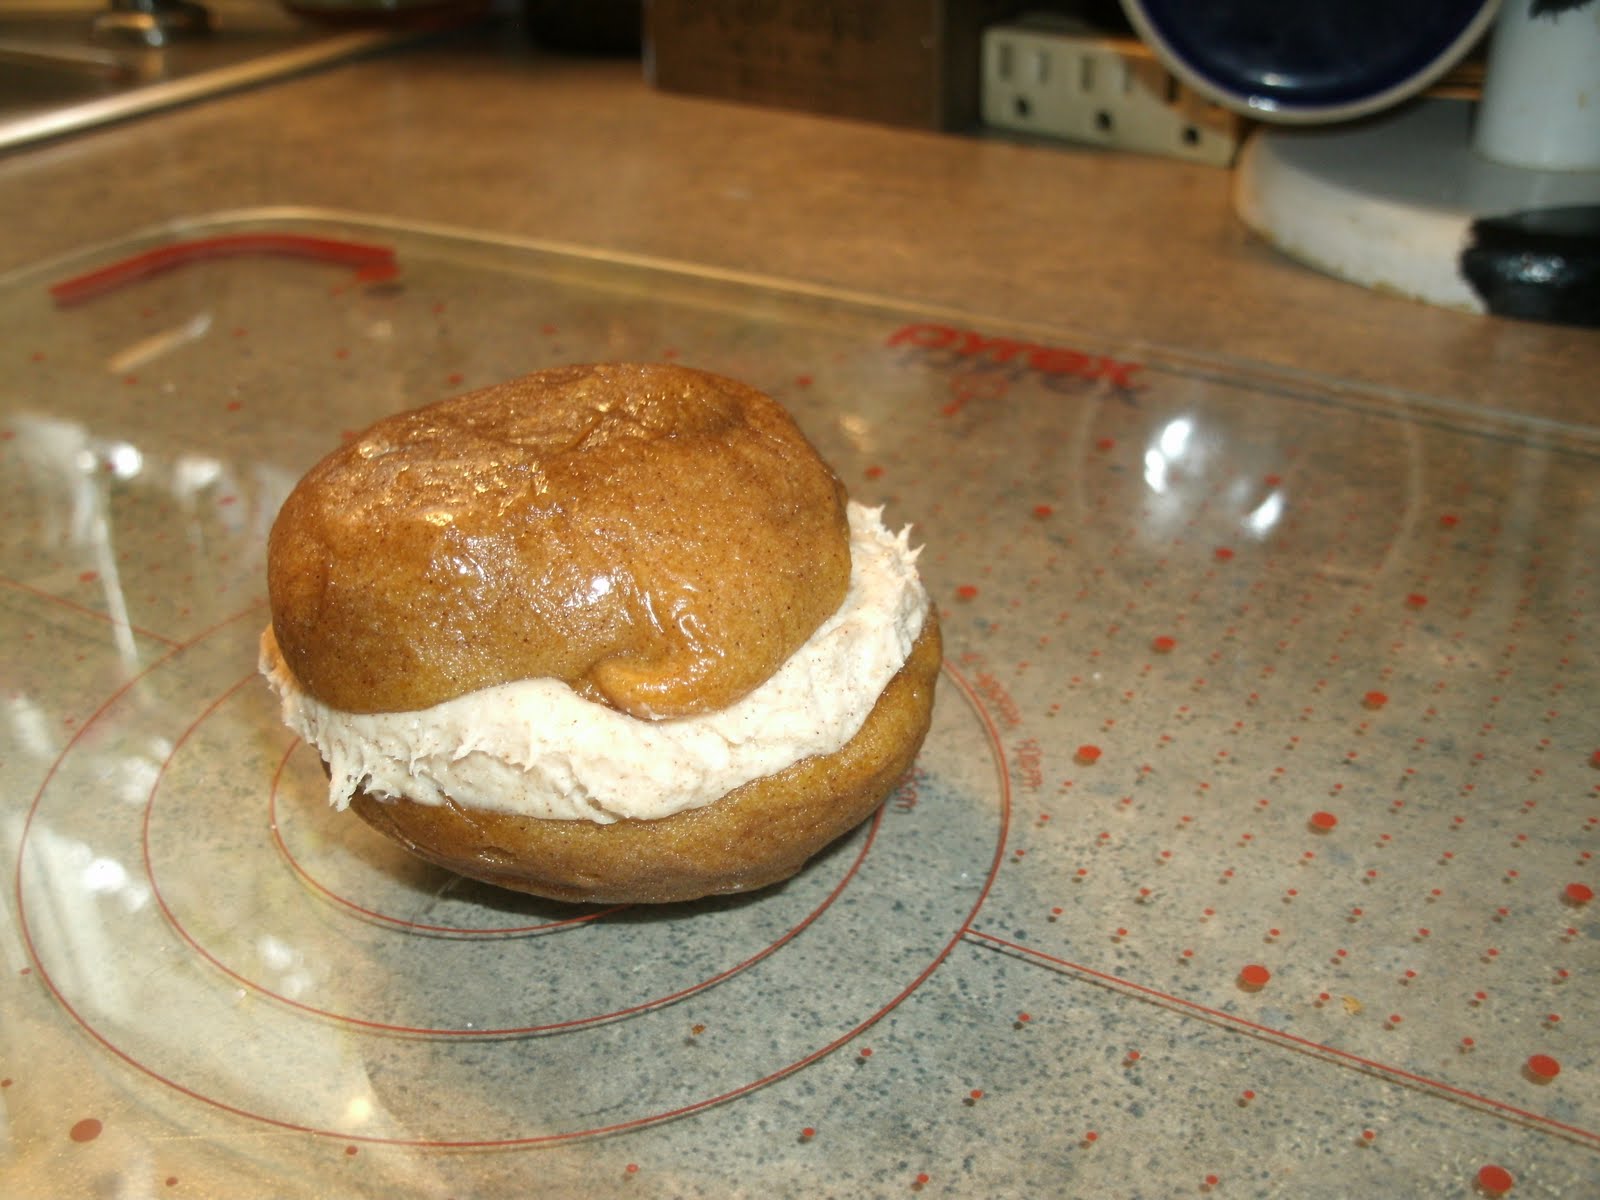
This last week, I made two things for which people seem to want the recipes. Pumpkin Whoopie Pies with Maple-Cinnamon Filling, and S'more Rice Krispie Treats. I decided that a blog post is the best way to circulate these recipes, while getting some extra views! (For those reading my blog just for these recipes, there are more if you look though my older posts - including my last post about Apple Slab Pie!)

With no further ado... Pumpkin Whoopie Pies, and S'mores Rice Krispie Treats!

Pumpkin Whoopie Pies with Maple-Cinnamon Filling
makes about 14

Ingredients
Cakes:
2 C. flour
1/2 tsp. baking powder
1/2 tsp. baking soda
1 1/2 tsp. ground cinnamon
1/4 tsp. salt
1 C. light brown sugar
1/2 C. vegetable oil
1 large egg - beaten
1 tsp. vanilla extract
1/2 C. canned pumpkin puree

Filling:
8oz. cream cheese - softened
4 Tbsp. unsalted butter - softened
2 Tbsp. real maple syrup
1 tsp. ground cinnamon
3/4 C. powdered sugar - sifted

Method
1. Preheat the oven to 350 degrees F. Line 2-3 large cookie sheets with parchment paper. Sift together the flour, baking powder, soda, cinnamon, and salt.
2. Place the brown sugar and oil in a large bowl and beat with an electric mixer for one minute. Beat in the egg and vanilla, then the pumpkin. Stir in the sifted flour mixture and beat until thoroughly incorporated.
3. Spoon 28 mounds of batter onto the prepared cookie sheets, spaced a little apart to allow room for spreading. Bake, one sheet at a time, in the preheated oven for 8-10 minutes, or until risen and set. Cool for about 5 minutes on the cookie sheets, then transfer to cooling racks.

For the filling, place the cream cheese and butter in a bowl and beat together until well blended. Beat in the maple syrup, cinnamon, and powdered sugar until smooth.

To assemble, pipe or spread the filling on the flat side of half the cakes. Top with the other half to make whoopie pies!


(Sorry for the unappetizing photo... I hadn't planned on blogging about these, so there was only one left to get a picture of!)

And...

S'mores Rice Krispie Treats
(Recipe from Glorious Treats)
makes 12 large treats


Ingredients
3 Tbsp. butter
40 regular marshmallows
5 C. Rice Krispies cereal
1 C. Golden Grahams cereal
1/2 C. mini chocolate chips
10 oz. semi-sweet chocolate (or about 1 C. chocolate chips)
6 full-sized graham crackers, broken in half
24 regular marshmallows

Directions
1. Butter (or spray lightly with cooking spray) a 9"x13" pan.
2. In a large microwave safe bowl, place 3 tablespoons of butter (cut into pieces), and 40 marshmallows. Microwave about 3 minutes (stirring after 2 minutes). Watch the microwave, cooking times may vary. Cook in microwave until butter and marshmallows are melted. Stir smooth.
3. Add the Rice Krispies and Golden Grahams cereals to melted marshmallows and stir to combine. Add mini chocolate chips, stir quickly, and immediately pour mixture into prepared 9"x13" pan. Press down into pan with spatula.
4. Melt semi-sweet chocolate (or chocolate chips) in a double boiler over medium heat. Heat until just melted. Spread chocolate on top of Rice Kripies mixture in pan. While the chocolate is still warm, lay graham cracker squares on top, leaving a bit of space between each cracker.
5. Put entire pan in the fridge or freezer (or a cool location) until the chocolate has set (about 20 minutes). Cut into squares with a sharp knife, using the lines between the graham crackers as a guide. Place treats on a large baking sheet, separated slightly.
6. Cut the 24 marshmallows in half and place cut side down onto graham crackers, 4 halves per treat. When all the graham crackers are topped with marshmallows, use a kitchen torch to toast the marshmallow. OR, you can toast the marshmallows in the oven - preheat your oven to broil, place baking sheet of treats in the oven, leaving the oven door slightly ajar. Broil about 30 seconds - watch them, they can burn quickly! Pop them back in the fridge or cool location to re-harden after marshmallows are toasted. Enjoy!


(If you don't want huge treats, halve the graham crackers again before putting them on the chocolate, to make them half-sized.)

Since I don't have handy print-formatted recipes, just copy and paste into Word, or print the whole post. :-P Go forth and spread the deliciousness!