Showing posts with label recipe. Show all posts

Wednesday, January 15, 2014

Sensational Cinnamon Bun Pancakes


Have you ever had IHOP's Cinn-a-Stack pancakes? If you have, you know that they're just about the best thing in the world. I only get them once in awhile, because I seem to only make it to IHOP when I have house guests. The nearest one is about 5 minutes up the road, so there's no reason I couldn't go more often, I just usually prefer somewhere with a drive-thru when I'm eating alone.

To satisfy my cravings, I decided to come up with my own version of a cinnamon bun pancake. They turned out wonderfully, and pretty close to the real deal. I had to share this with the world, so everyone can have Cinn-a-Stack without even leaving the house. Heck, you don't even have to leave your pajamas!


Cinnamon Bun Pancakes
Ingredients
Icing:
- About 2oz. cream cheese - softened
- 1/4 C. milk
- 8 Tbsp. powdered sugar

Filling:
-  1/2 C. packed brown sugar
- 1 1/2 tsp. cinnamon
- pinch of salt
- 2 Tbsp. unsalted butter

Pancakes:
- 1 1/2 C. flour
- 3 1/2 tsp. baking powder
- 1/2 tsp. salt
- 1 heaping Tbsp. sugar
- 1 1/4 C. milk
- 1 large egg
- 3 Tbsp. butter - melted

Method
- To make the icing, simply whisk together the soft cream cheese, milk, and powdered sugar. Start with about 5-6 Tbsp. of the sugar, and add the rest until you get the desired consistency. 


- For the filling, place the brown sugar, cinnamon, salt, and butter in a small saucepan. Heat and stir over low heat until the butter has melted and the mixture is liquid. Keep over the lowest heat until ready to use. After awhile, the mixture will be come less liquid, and more grainy.


- For the pancakes, place the flour, baking powder, salt and sugar in a mixing bowl. Whisk together to eliminate any clumps. Form a well in the center of the dry ingredients and pour in the milk, egg, and melted butter. Stir together until well combined. Let the mixture sit for 2-5 minutes. The longer it sits before cooking, the fluffier the pancakes will be!


- Heat a skillet over medium heat. Once the pan is hot, pour in the batter about a half a cup at a time, and brown on both sides. Stack the pancakes as they come out of the pan, spreading a few tablespoons of the filling on top of each as they hit the plate.


- When all of the batter is used, pour the icing over the stack, close your eyes, and pretend that you're at IHOP!


Enjoy!


Monday, May 6, 2013

Tofu-Veggie Stir-Fry


I'm doing it. I'm really doing it. I'm attempting to go one month living a vegetarian lifestyle. It's something that has interested me for a long time. I'm curious about how it will make me feel, and if it will help me to lose any weight. I considered trying to go vegan, but there's no way I'm giving up cheese or ice cream!

I started on May 1st, so today is day 6 of my experiment. I might go really crazy and try a fruit/veggie cleanse or even a juice fast while I'm on this bandwagon. Both the vegetarian lifestyle and a cleanse are things on my 30 Things Before 30 list... of which I have been rather neglectful. I'm trying to step it up since I'm down to four years until I turn 30 (yikes....).

I know it's only been six days, but so far giving up meat hasn't been difficult. It's a little hard at work because the employee cafeterias don't have many healthy vegetarian options. The past couple of days, I've made do with a salad and some fries. I'm probably going to start packing a lunch more often. This is where learning to cook without meat comes in (or, you know, lots of PB&J's). I sought out tofu at the grocery store and decided to try to make something with it. I came up with the idea of stir-frying, and it seemed easy and something I knew I would like.

Now, this wasn't as homemade as I would have liked, but I had just gotten off of work and I was tired and lazy, so I bought a frozen stir-fry veggie mix (sugar snap peas, carrots, onions, peppers, broccoli, celery, water chestnuts, and green beans), and a jar of stir-fry sauce. Someday, I'll try the sauce from scratch, but the frozen mixed veggies are just so easy. No washing, no dicing/chopping/julienne-ing, no wait time for it to cook.... So nice.

This is the perfect recipe for those nights when you just don't want to put a lot of effort into a healthy dinner, but still want something satisfying and impressive. It's fast, easy, and delicious!


Tofu-Veggie Stir-Fry

Ingredients:
2 Tbsp. Olive Oil
3 cloves Garlic - minced
7 oz. Extra Firm Tofu - cubed
1 bag Frozen Mixed Vegetables - thawed (Any variety you like.)
2 tsp. Crushed Red Pepper
1/8 tsp. Ground Cloves
1/2 C. Stir-Fry Sauce (I used La Choy brand.) 


Method:
-  In a large skillet, heat the olive oil over med-high heat. Add in the garlic and cook for about 30 seconds, until it softens and starts to brown. Add the tofu and cook until golden.

- Stir in the veggies, crushed red pepper, and cloves, until all incorporated. Let cook, stirring occasionally, until the veggies are heated through.


-Stir in the sauce so that everything is coated, and let cook for about a minute, stirring occasionally.


- Remove from heat and let stand a minute or two before serving, to let the sauce set and the flavors come together.

I served mine with brown rice. It'd be great by itself, too, or with something like Quinoa or Couscous.  If you want to get really fancy, you could go the Lo Mein route, but that's a whole other dish to prepare!


The whole recipe (not including the rice) has about 760 calories in it, and I got two meals out of it, so 380 calories for a serving is amazing! Let's say half a cup of brown rice has about 110 calories in it, that's only 490 calories for the whole meal! Of course, I enjoyed a Yuengling Lager with my meal for another 135 calories... oops!

Please comment with some of your favorite vegetarian/tofu recipes that I can try out!

Enjoy!

Wednesday, November 30, 2011

Stupendous Shoo-fly Pie

I was dessert man for Thanksgiving. We always have two dinners - one with my mom's side of the family, and one with my dad's. For my mom's side, I just made a Pumpkin Roll and my uncle made pies. For my dad's, I made another Pumpkin Roll, a Caramel Apple Pie, and a Shoo-fly Pie (wet-bottom, of course). While my Caramel Apple Pie was freakin' delicious, I didn't have enough apples so it looked a little empty and sad. My Shoo-fly Pie, however, was perfect (if I do say so myself)!

I'm not really sure where this recipe came from. I'm thinking it's out of one of my great grandmother's cookbooks, but I'm not positive. Shoo-fly Pies are very PA Dutch. I love going to a new area of the world and having people ask me if there are actual flies in it. There are not, by the way. "Shoo-fly" comes from the pie being so sweet from the molasses and people having to shoo the flies away.

Anyway, here's my secret family recipe... possibly.... It might be from the internet somewhere... or a cookbook.... Dunno, but it's my recipe now!


Shoo-fly Pie

Ingredients:
9" pie crust
1/2 tsp. baking soda
1/2 C. warm water
1/2 C. molasses
1 C. flour
1/4 C. sugar
1/4 tsp. baking soda
2 Tbsp. butter or margarine

Method:
- Chill crust for about an hour before use. Preheat oven to 425 degrees F.

-Stir together the 1/2 tsp. baking soda and the warm water. Add the molasses and stir until the mixture is slightly foamy. Pour molasses mixture into the pie crust.

-Mix together the flour, sugar, and 1/4 tsp. baking soda. With a pasty blender, cut the butter into the flour mixture until very fine crumbs form. Sprinkle the crumb mixture evenly over the wet mixture in the crust. (The idea is that some of the liquid is soaked up, but the bottom will still be wetter than the top - "wet-bottom".)

-Immediately place in the oven and bake at 425 degrees F for 10 minutes, then reduce heat to 350 degrees F and continue baking for about 40 minutes, or until the pie is set and crust is browned.


Enjoy!

Thursday, November 17, 2011

"Coconut Bar Pie"

Sorry my posting has been pretty erratic lately. I'm busy living my life of leisure. I'm working a few hours a week at the Campus, but mostly I watch Netflix and eat.

So how many of you tried the Coconut Bar Pie when Perkins still had it? It was probably the best pie I've ever had. Ever. Well, it was a limited time thing, so I decided to try to make my own version so I can have it whenever I want. I took bits and pieces from several other recipes, and combined them to make my own Coconut Bar Pie recipe.

I'm pretty stoked because this is really the first recipe I've come up with on my own. I'm great at following recipes, but not at making them up. It turned out pretty great, so I'm totally impressed with myself. Now... I'm not sure if "Coconut Bar Pie" is copyrighted or anything by Perkins, so if it is, I'll probably change the name to Coconut Creme-Truffle Pie, since the chocolate layer is actually just a recipe for truffle filling. It's pretty amazing, not gonna lie.


Coconut Bar Pie

Ingredients:

Crust:
1 C. chocolate graham cracker crumbs
1/4 C. sugar
3 Tbsp. melted butter

Chocolate Layer:
1/4 + 1/8 C. whipping cream (3/8 C. total)
1 Tbsp. butter
7 oz. chocolate chips, or chopped semi-sweet chocolate
1/4 C. flaked coconut

Coconut Creme Layer:
Lg. package (5oz.) instant vanilla pudding
1 3/4 C. cold milk
1 1/2 tsp. coconut extract
1/2 C. flaked coconut
1 container lite Cool Whip - thawed

Garnish:
Toasted Coconut


Method:

1. For the crust, preheat oven to 375 degrees F. Spray a 9" deep dish pie plate with cooking spray. Combine crumbs, sugar, and butter in a mixing bowl. Mix until the mixture is an even consistency (no lumps). Press crumb mixture into pie plate to form a crust. Bake at 375 for 10 minutes. Do not overbake - it will be too hard! Cool completely.

2. In a saucepan, heat whipping cream and butter over medium heat until just boiling. Remove pan from heat and add chocolate. Do not stir right away - just cover the pan and let sit for 5 minutes. Uncover and stir until chocolate is completely melted. Spread chocolate mixture into the bottom of the crust. Sprinkle with 1/4 C. flaked coconut. Put in the fridge to let the chocolate set.

3. Whisk together the instant pudding, milk, and coconut extract until combined and thick. Stir in the 1/2 C. flaked coconut. Fold in half of the container of Cool Whip. Spread pudding mixture on top of the chocolate layer in the crust.

4. Top with the other half of the Cool Whip. To toast the coconut, spread a handful on a cookie sheet and put under the broiler in the oven until lightly browned. Keep an eye on it, it can burn quickly! Sprinkle toasted coconut on top, and refrigerate the pie until it's set.


Enjoy! It's delicious!


Hint: Take the pie out of the fridge half an hour or so before you plan to serve it. I learned the hard way that it's difficult to cut through the chocolate layer when it's still fridge-cold and solid!

Tuesday, September 27, 2011

Fall Recipes

So I've actually had the opportunity to make quite a bit of food recently. It's very exciting! Now I'm thinking about having a stand at the New Columbia Apple Butter Festival. I would have some crocheted stuff, as well as baked goods. We'll see how much crocheting I get done in the next couple of weeks.

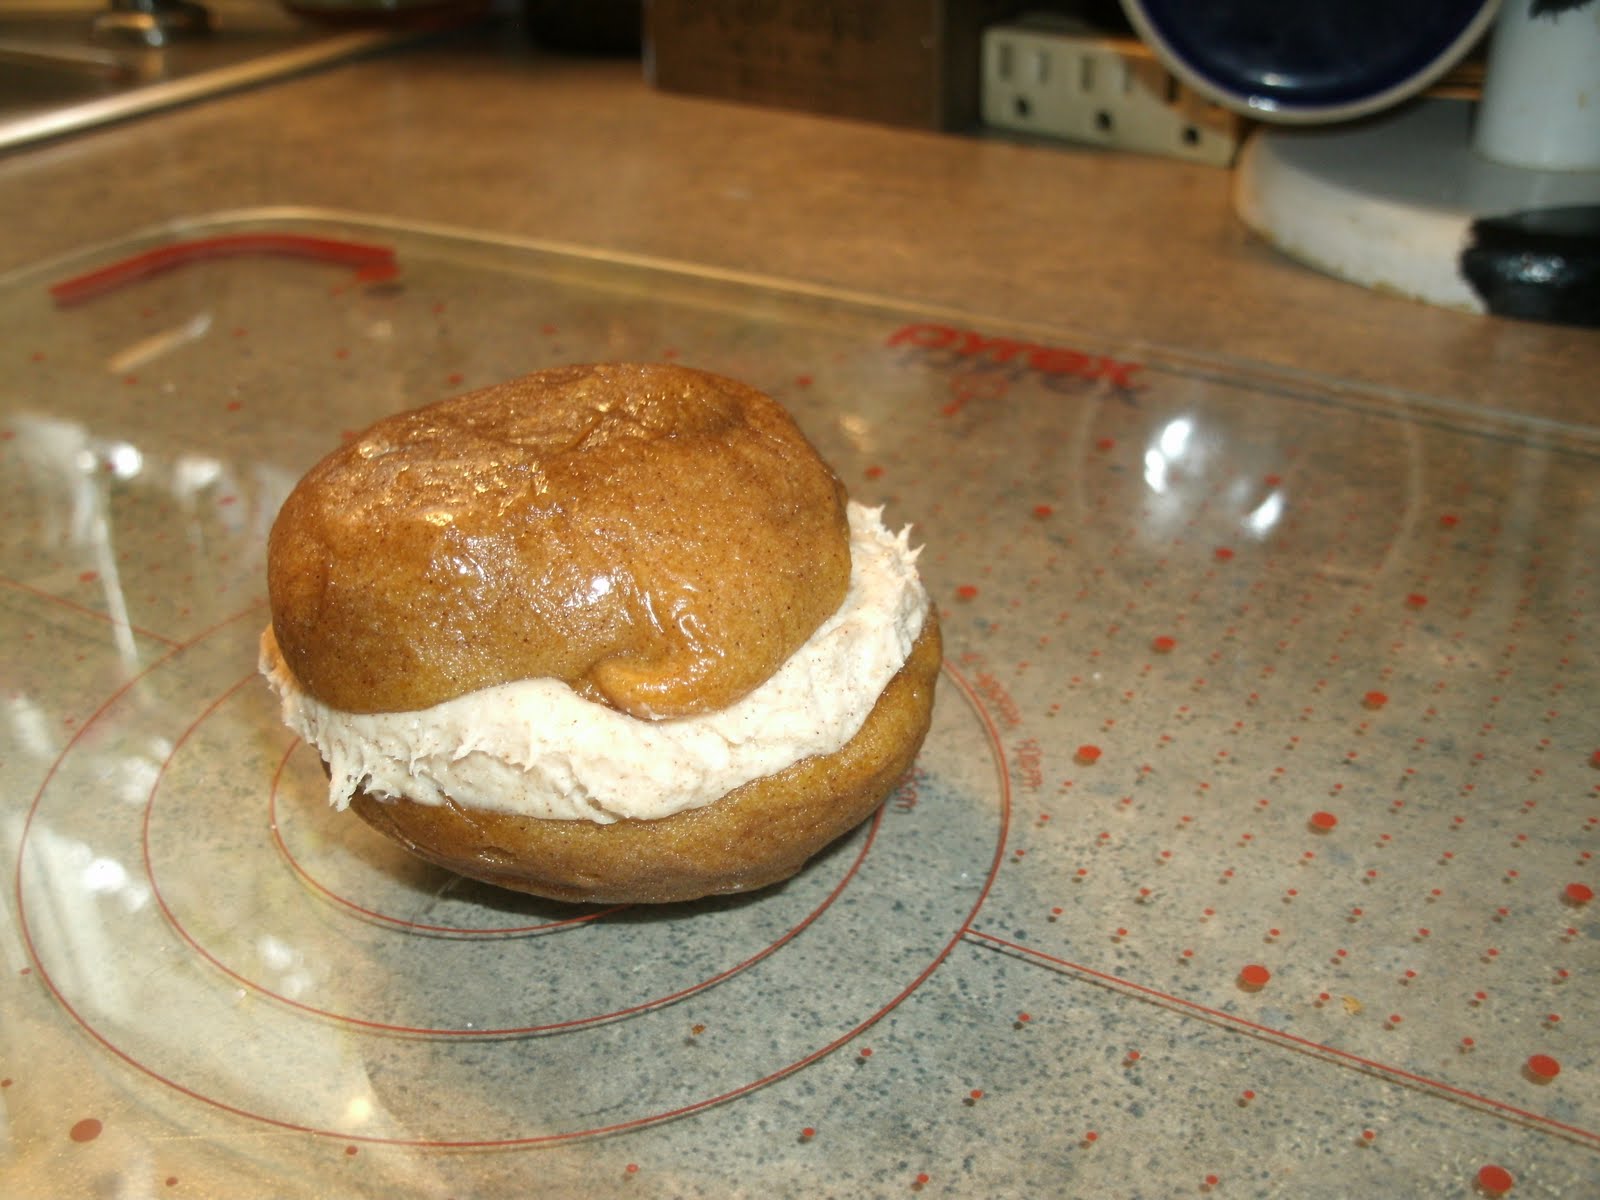
This last week, I made two things for which people seem to want the recipes. Pumpkin Whoopie Pies with Maple-Cinnamon Filling, and S'more Rice Krispie Treats. I decided that a blog post is the best way to circulate these recipes, while getting some extra views! (For those reading my blog just for these recipes, there are more if you look though my older posts - including my last post about Apple Slab Pie!)

With no further ado... Pumpkin Whoopie Pies, and S'mores Rice Krispie Treats!

Pumpkin Whoopie Pies with Maple-Cinnamon Filling
makes about 14

Ingredients
Cakes:
2 C. flour
1/2 tsp. baking powder
1/2 tsp. baking soda
1 1/2 tsp. ground cinnamon
1/4 tsp. salt
1 C. light brown sugar
1/2 C. vegetable oil
1 large egg - beaten
1 tsp. vanilla extract
1/2 C. canned pumpkin puree

Filling:
8oz. cream cheese - softened
4 Tbsp. unsalted butter - softened
2 Tbsp. real maple syrup
1 tsp. ground cinnamon
3/4 C. powdered sugar - sifted

Method
1. Preheat the oven to 350 degrees F. Line 2-3 large cookie sheets with parchment paper. Sift together the flour, baking powder, soda, cinnamon, and salt.
2. Place the brown sugar and oil in a large bowl and beat with an electric mixer for one minute. Beat in the egg and vanilla, then the pumpkin. Stir in the sifted flour mixture and beat until thoroughly incorporated.
3. Spoon 28 mounds of batter onto the prepared cookie sheets, spaced a little apart to allow room for spreading. Bake, one sheet at a time, in the preheated oven for 8-10 minutes, or until risen and set. Cool for about 5 minutes on the cookie sheets, then transfer to cooling racks.

For the filling, place the cream cheese and butter in a bowl and beat together until well blended. Beat in the maple syrup, cinnamon, and powdered sugar until smooth.

To assemble, pipe or spread the filling on the flat side of half the cakes. Top with the other half to make whoopie pies!


(Sorry for the unappetizing photo... I hadn't planned on blogging about these, so there was only one left to get a picture of!)

And...

S'mores Rice Krispie Treats
(Recipe from Glorious Treats)
makes 12 large treats


Ingredients
3 Tbsp. butter
40 regular marshmallows
5 C. Rice Krispies cereal
1 C. Golden Grahams cereal
1/2 C. mini chocolate chips
10 oz. semi-sweet chocolate (or about 1 C. chocolate chips)
6 full-sized graham crackers, broken in half
24 regular marshmallows

Directions
1. Butter (or spray lightly with cooking spray) a 9"x13" pan.
2. In a large microwave safe bowl, place 3 tablespoons of butter (cut into pieces), and 40 marshmallows. Microwave about 3 minutes (stirring after 2 minutes). Watch the microwave, cooking times may vary. Cook in microwave until butter and marshmallows are melted. Stir smooth.
3. Add the Rice Krispies and Golden Grahams cereals to melted marshmallows and stir to combine. Add mini chocolate chips, stir quickly, and immediately pour mixture into prepared 9"x13" pan. Press down into pan with spatula.
4. Melt semi-sweet chocolate (or chocolate chips) in a double boiler over medium heat. Heat until just melted. Spread chocolate on top of Rice Kripies mixture in pan. While the chocolate is still warm, lay graham cracker squares on top, leaving a bit of space between each cracker.
5. Put entire pan in the fridge or freezer (or a cool location) until the chocolate has set (about 20 minutes). Cut into squares with a sharp knife, using the lines between the graham crackers as a guide. Place treats on a large baking sheet, separated slightly.
6. Cut the 24 marshmallows in half and place cut side down onto graham crackers, 4 halves per treat. When all the graham crackers are topped with marshmallows, use a kitchen torch to toast the marshmallow. OR, you can toast the marshmallows in the oven - preheat your oven to broil, place baking sheet of treats in the oven, leaving the oven door slightly ajar. Broil about 30 seconds - watch them, they can burn quickly! Pop them back in the fridge or cool location to re-harden after marshmallows are toasted. Enjoy!


(If you don't want huge treats, halve the graham crackers again before putting them on the chocolate, to make them half-sized.)

Since I don't have handy print-formatted recipes, just copy and paste into Word, or print the whole post. :-P Go forth and spread the deliciousness!

Friday, September 23, 2011

Amazing Apple Slab Pie

So every fall, I start to get the 100 Days of Holidays e-newsletter from Better Homes & Gardens. It starts at the beginning of fall and goes through Christmas. They have recipes, decorating ideas, crafts, etc. One recipe this year so far was Crumb-Topped Apple Slab Pie. It's basically an apple pie, but made in a jellyroll pan, so it can feed a crowd.


It was so much fun to make. I'm usually bad at crust, but this one was super easy.


I also hate prepping apples, but my mom and I got a new toy:


It's pretty much magic. Everyone in the world should have a peeler/corer/slicer.

I had to share this recipe. It was lots of fun to put together, and it looks amazing. I can't try it because it's for Mom to take to school, but it's basically a huge apple pie. It can't be anything but awesome.


Crumb-Topped Apple Slab Pie

(From Better Homes & Gardens)

Ingredients
2 1/4 C. flour
3/4 tsp. salt
2/3 C. butter-flavored shortening
8 Tbsp. cold water
2/3 C. sugar
1/3 C. flour
1 tsp. ground cinnamon
3 1/2 lbs. baking apples - cored, peeled, and sliced

Crumb Topping:
1 C. quick oats
1 C. packed brown sugar
1/2 C. flour
1/2 C. butter
1/2 C. chopped pecans (optional)


Method

Line a 15x10x1-inch baking pan with foil, extending the foil up over the edges of the pan. Spray lightly with non-stick spray and set aside.

For dough: In a large bowl, stir together the 2-1/4 C. flour and the salt. Using a pastry blender, cut in shortening until mixture resembles coarse crumbs. Sprinkle 1 tablespoon of the cold water over the flour mixture; gently toss with a fork. Repeat, using 1 tablespoon cold water at a time, until all of the flour mixture is moistened. Using your fingers, gently knead the dough just until a ball forms.

Preheat oven to 375F. On a floured surface, roll the dough into a rectangle large enough to fill the pan. Wrap it around the rolling pin, and unroll it into the prepared baking pan. Ease dough into the pan and up the sides, being careful not to stretch it. Trim dough to fit the pan, where needed.

In a large bowl, combine the sugar, the 1/3 C. flour, and the cinnamon; add apples. Toss lightly until apples are coated. Spoon apple mixture into dough-lined pan; spread evenly.

To make the crumb topping, stir together the quick oats, packed brown sugar, and 1/2 C. all-purpose flour. Using a pastry blender, cut in the butter until topping mixture resembles coarse crumbs. Stir in chopped pecans. Sprinkle topping over the apple mixture in the pan.

Bake for 40 to 45 minutes, or until apples are tender. Cool in pan on a wire rack. Serve warm or cool completely. Cut into rectangles. Makes about 25 servings.


Enjoy! Feel free to leave comments about anything I should add to my fall baking agenda!